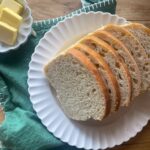
Soft and Fluffy Sourdough Sandwich Bread
This soft and flavorful sourdough sandwich bread is everything you love about classic sourdough bread—made just a little more practical for everyday life. With a tender crumb, subtle tang, and golden crust, it’s the perfect loaf for morning toast, hearty sandwiches, or grilled cheese. Simple, wholesome, and made to share—this is sourdough you’ll bake again and again.

This sandwich bread is a mix between my recipe for honey white sandwich bread and this fresh milled flour sandwich bread recipe. I maintained the same simple ingredients, except I swapped the yeast for active sourdough starter. The result was a soft and fluffy sandwich bread recipe that is absolutely perfect!
My family loved this recipe and I know you will too. Make sure to save it to keep in your regular rotation!
Why You’ll Love This Recipe
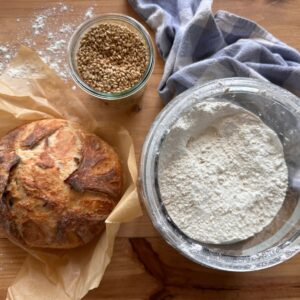
Ingredients You’ll Need
This is a quick overview of some essential ingredients needed for this recipe. Be sure to check out the recipe card below for the full list!
Tips for Preparing to Make This Recipe
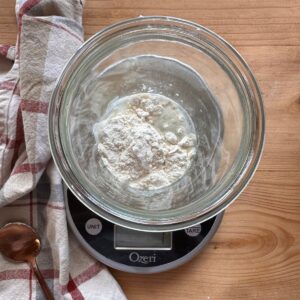
- Measuring the Flour: I highly recommend using a food scale to measure out the flour. This will result in a much lighter, fluffier loaf.
- Sourdough Starter: Make sure your starter is active and bubbly before adding to the dough.
- Temperature of Ingredients: Make sure the water and milk are warm, but not too hot (around 110 degrees F). If the liquid is too hot, it could kill the starter. Also be sure to make sure the melted better has had a chance to cool before adding to the dough.
- Kneading the Dough: I use my stand mixer with a dough hook attachment to knead the dough. I find it takes around 8-10 minutes. You could also knead the dough by hand. The dough is ready to rise when it comes together in a ball, is smooth and elastic, and it passes the windowpane test. To do this, take a small piece of dough in your fingers, stretch it apart to the point of being thin and see-through. If it breaks, it needs to be kneaded further. If it does not break, the gluten should be sufficiently developed.
- Bulk Ferment & Rise Time: The dough needs to bulk ferment at room temperature for at least 10 hours. I like to mix up the dough in the evening and let it sit overnight before shaping and baking the next day. Once shaped, the dough will need to rise anywhere from 1-3 hours until puffy. This usually takes 2-3 hours in my kitchen.
- Baking: Lower the oven rack to a lower position when baking the bread. This will prevent the top from browning too quickly while baking.
- Baking Schedule: This is an overnight dough which takes approximately 10-12 hours to bulk ferment at 68 degrees F. It will then need to rise again for 1-3 hours before baking. Start the night before, in the evening, and plan to bake the following day.
Be sure to check out the full recipe and ingredient list below!
Shop Recommended Tools
Disclaimer: As an Amazon associate, I earn from qualifying purchases with no extra cost to you. Read my full disclosure policy.
Step by Step Instructions
- Make the Dough: In the bowl of a stand mixer fitted with a dough hook attachment or a large mixing bowl, combine the milk, water, sourdough starter, honey, melted butter, salt, and flour. Turning the mixing on medium-low speed, begin kneading the dough until combined, approximately 8-10 minutes.
- Bulk Ferment: Once the dough has been sufficiently kneaded, add it to a well oiled bowl (I use avocado oil) to bulk ferment at room temperature for 10-12 hours (I typically mix in the evening and let it sit out on the counter overnight).
- The next morning, Grease a loaf pan and set aside.
- Shape: Once the dough has doubled, remove it from the bowl and place it on a lightly floured surface. Begin shaping the dough by pressing it out into a rough rectangle shape, about 8 x 15 inches. Starting at the bottom, roll it into a log, tucking the ends underneath. Let it rest for a few minutes, then, with floured hands, pull the dough towards you, creating surface tension to tighten its shape. Place the dough in the prepared loaf pan, seam side down.
- Rise: Cover the shaped loaf with plastic wrap or a light tea towel. Allow it to rise again until it’s about 1 inch above the top of the loaf pan, 1-3 hours. (Note: my house stays around 68 degrees and it always takes closer to 3 hours to rise).
- Bake the bread: Once the bread has risen and is nice and puffy, preheat the oven to 375 degrees. Bake for 40-45 minutes or until golden brown on top. If you notice the top browning too quickly, loosely tent the pan with aluminum foil. The bread is done when a digital food thermometer placed at the center of the loaf reads 200-205°F.
- Remove from the oven and allow bread to cool for at least 10 minutes in the pan before removing and slicing. Enjoy!

Recipe FAQs
This recipe uses ingredients like butter and milk, creating an enriched dough that ensures the bread will be much more soft. Also, make sure the dough has been properly kneaded. This ensures proper gluten development, which provides structure and softness.
To avoid sticking, make sure the loaf pan is properly greased with butter, oil, or nonstick spray. Alternatively, you could line the pan with parchment paper for easy release. Also, allow the bread to cool in the pan for at least 10 minutes before trying to remove it. This can help prevent sticking/tearing.
Sourdough Sandwich Bread Recipe Ideas
Sandwich bread is extremely versatile for use in a variety of recipes. It makes a great sandwich when topped with homemade avocado oil mayo and your favorite toppings. Toast it and and serve with a generous slab of butter and strawberry jam for an easy breakfast. If you end up with any leftover stale bread (doubtful but possible) repurpose it by turning it into sourdough breadcrumbs!
Pin it For Later!

More Bread Recipes
Check out these other reader favorite recipes!


Sourdough Sandwich Bread
- Total Time: 55 minutes
Description
This soft and flavorful sourdough sandwich bread is everything you love about classic sourdough bread—made just a little more practical for everyday life. With a tender crumb, subtle tang, and golden crust, it’s the perfect loaf for morning toast, hearty sandwiches, or grilled cheese. Simple, wholesome, and made to share—this is sourdough you’ll bake again and again.
Ingredients
- 1 cup milk
- ½ cup water
- 3 tbsp honey
- ½ cup active sourdough starter
- 3 tablespoon butter, melted and cooled slightly
- 1 ½ tsp salt
- 500 grams bread flour ((approximately 4 cups))
Instructions
- Make the Dough: In the bowl of a stand mixer fitted with a dough hook attachment or a large mixing bowl, combine the milk, water, sourdough starter, honey, melted butter, salt, and flour. Turning the mixing on medium-low speed, begin kneading the dough until combined, approximately 8-10 minutes.
- Bulk Ferment: Once the dough has been sufficiently kneaded, add it to a well oiled bowl (I use avocado oil) to bulk ferment at room temperature for 10-12 hours (I typically mix in the evening and let it sit out on the counter overnight).
- The next morning, grease a loaf pan and set aside.
- Shape: Once the dough has doubled, remove it from the bowl and place it on a lightly floured surface. Begin shaping the dough by pressing it out into a rough rectangle shape, about 8 x 15 inches. Starting at the bottom, roll it into a log, tucking the ends underneath. Let it rest for a few minutes, then, with floured hands, pull the dough towards you, creating surface tension to tighten its shape. Place the dough in the prepared loaf pan, seam side down.
- Rise: Cover the shaped loaf with plastic wrap or a light tea towel. Allow it to rise again until it’s about 1 inch above the top of the loaf pan, 1-3 hours. (Note: my house stays around 68 degrees and it always takes closer to 3 hours to rise).
- Bake the bread: Once the bread has risen and is nice and puffy, preheat the oven to 375 degrees. Bake for 40-45 minutes or until golden brown on top. If you notice the top browning too quickly, loosely tent the pan with aluminum foil. The bread is done when a digital food thermometer placed in the center of the loaf reads 200-205°F.
- Remove from the oven and allow bread to cool for at least 10 minutes in the pan before removing and slicing. Enjoy!
Notes
- Measuring the Flour: I highly recommend using a food scale to measure out the flour. This will result in a much lighter, fluffier loaf.
- Temperature of Ingredients: Make sure the water and milk are warm, but not too hot (around 110 degrees F). If the liquid is too hot, it could kill the starter. Also be sure to make sure the melted better has had a chance to cool before adding to the dough.
- Kneading the Dough: I use my stand mixer with a dough hook attachment to knead the dough. I find it takes around 8-10 minutes. You could also knead the dough by hand. The dough is ready to rise when it comes together in a ball, is smooth and elastic, and it passes the windowpane test. To do this, take a small piece of dough in your fingers, stretch it apart to the point of being thin and see-through. If it breaks, it needs to be kneaded further. If it does not break, the gluten should be sufficiently developed.
- Bulk Ferment & Rise Time: The dough needs to bulk ferment at room temperature for at least 10 hours. I like to mix up the dough in the evening and let it sit overnight before shaping and baking the next day. Once shaped, the dough will need to rise anywhere from 1-3 hours until puffy. This usually takes 2-3 hours in my kitchen.
- Sourdough Starter: Make sure your starter is active and bubbly before adding to the dough.
- Baking: Lower the oven rack to a lower position when baking the bread. This will prevent the top from browning too quickly while baking.
- Baking Schedule: This is an overnight dough which takes approximately 10-12 hours to bulk ferment at 68 degrees F. It will then need to rise again for 1-3 hours before baking. Start the night before, in the evening, and plan to bake the following day.
- Storage: Cover the bread tightly and store it in a Ziploc bag at room temperature for up to 5 days. Bread will keep longer when stored in the fridge- up to 10 days.
- Freezing Instructions: Allow the baked bread to cool completely before wrapping tightly in plastic wrap or aluminum foil, then store in a freezer safe zip topped bag. It will store well in the freezer for up to 3 months. Let it thaw in the fridge or on the counter and then reheat as desired.
- Prep Time: 10 minutes
- Cook Time: 45 minutes
- Category: Bread Recipes
- Cuisine: American
If you enjoyed this sourdough sandwich bread recipe, make sure to come back and leave a 5 star rating and a comment! Tag me on Instagram with your creations @ourhandcraftedhomeblog.


I was impressed how soft and pillowy this loaf turned out. It slices beautifully and makes the best grilled cheese ever!!
SO SO good!! It’s nice and soft which I have a hard time achieving when making bread at home. My kids loved it for PB&J’s! I will definitely be making this more.
Thanks so much! Glad you enjoyed the recipe 🙂