How to Make Your Own Sourdough Starter from Scratch
Learn how to make a sourdough starter from scratch using simple ingredients and easy step-by-step instructions. Whether you’re a seasoned sourdough pro or just getting started, this guide will help you build a strong, active starter at home that will last for years to come.
Sourdough Starter: The Gift that Keeps on Giving
Baking with an active and bubbly starter is one of my favorite things to do in my kitchen. Once you nail that first loaf of bread, it really becomes such a fun (and kind of addictive!) process.
Caring for a starter is nothing to be intimidated by, and if you’ve ever wanted to create your own from scratch, this post outlines all you need to know, I promise!

Jump to:
What is a Sourdough Starter?
A sourdough starter is essentially just a mixture of flour and water that has been left to sit out at room temperature. Over time, this mixture begins to ferment and colonizes, creating bacteria and wild yeast that is perfect for bread baking!
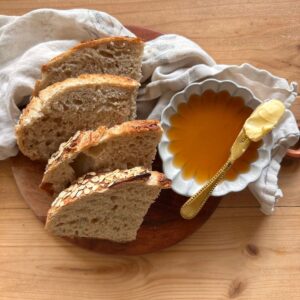
Once the starter is mature, it will last for years and years when fed and maintained properly. If you need some inspiration for where to start, check out this collection of sourdough bread recipes.
Before You Start: Shop Recommended Tools
Disclaimer: This post contains affiliate links. Read our disclosure policy.
Step by Step Instructions
Day 1: Mix together the flour and water, then store in a warm spot for 24 hours.
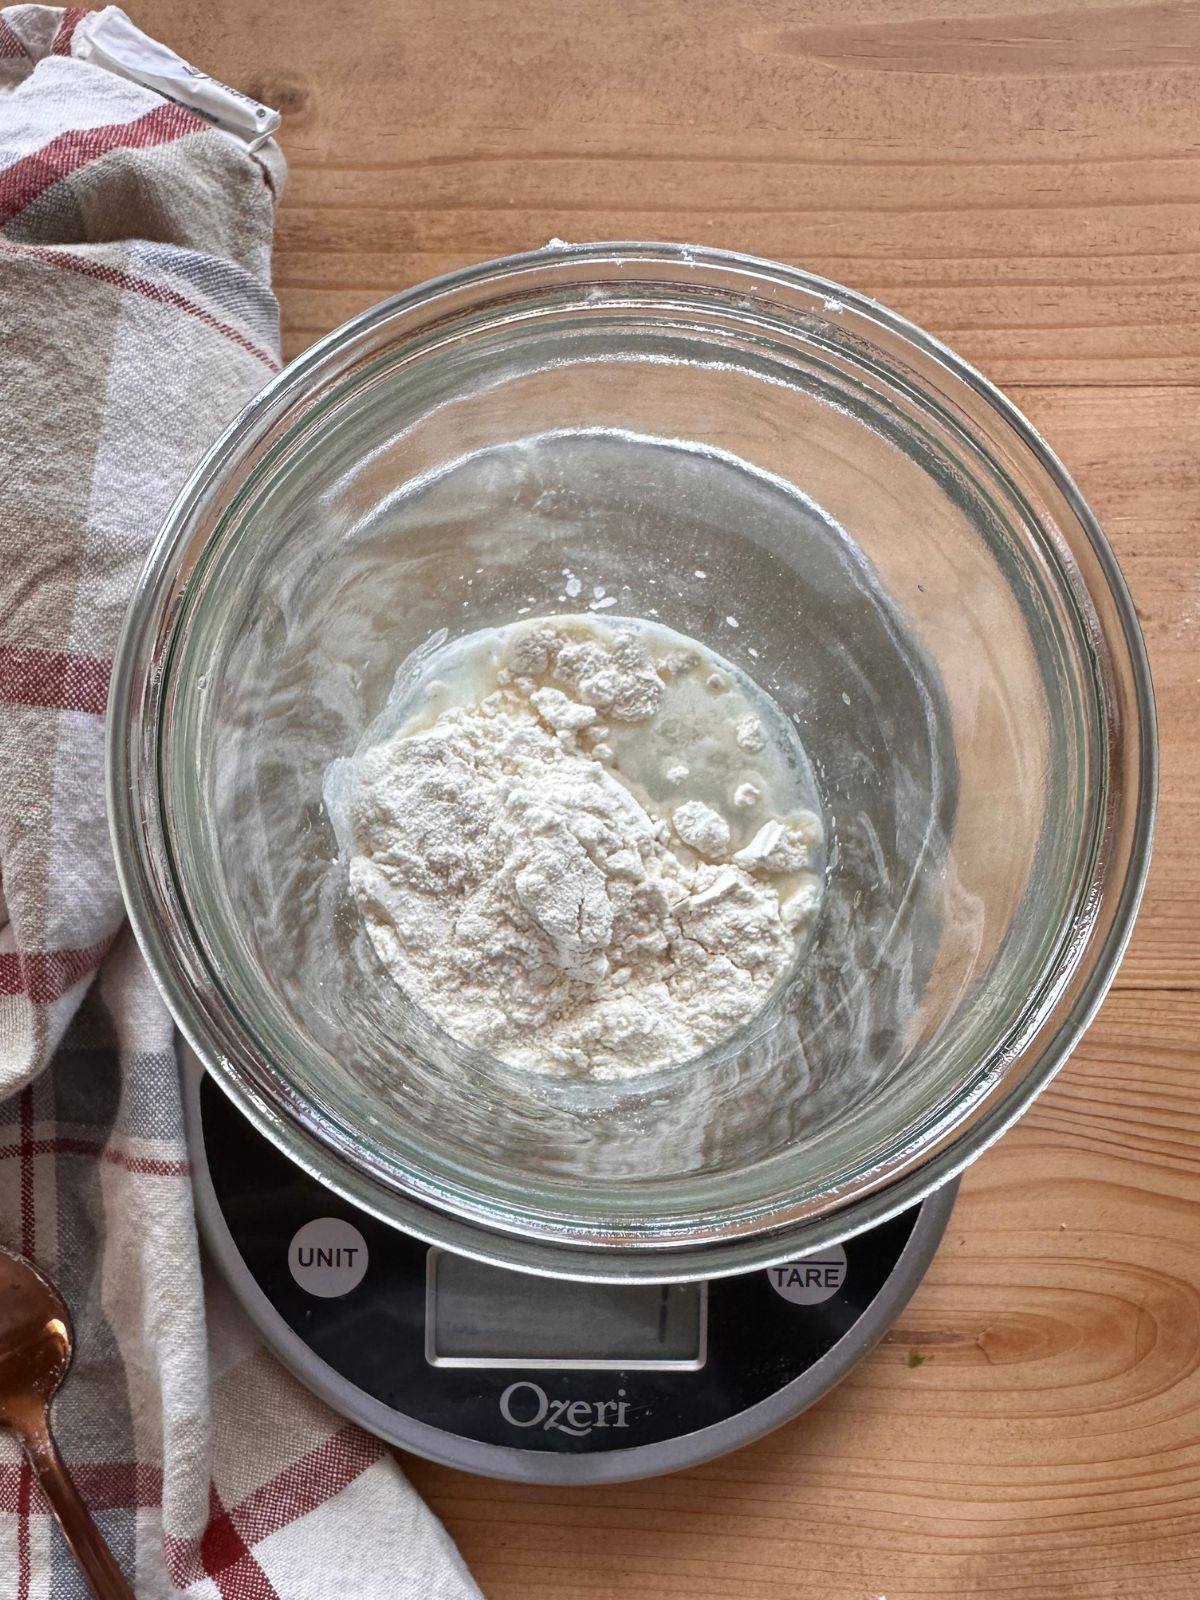
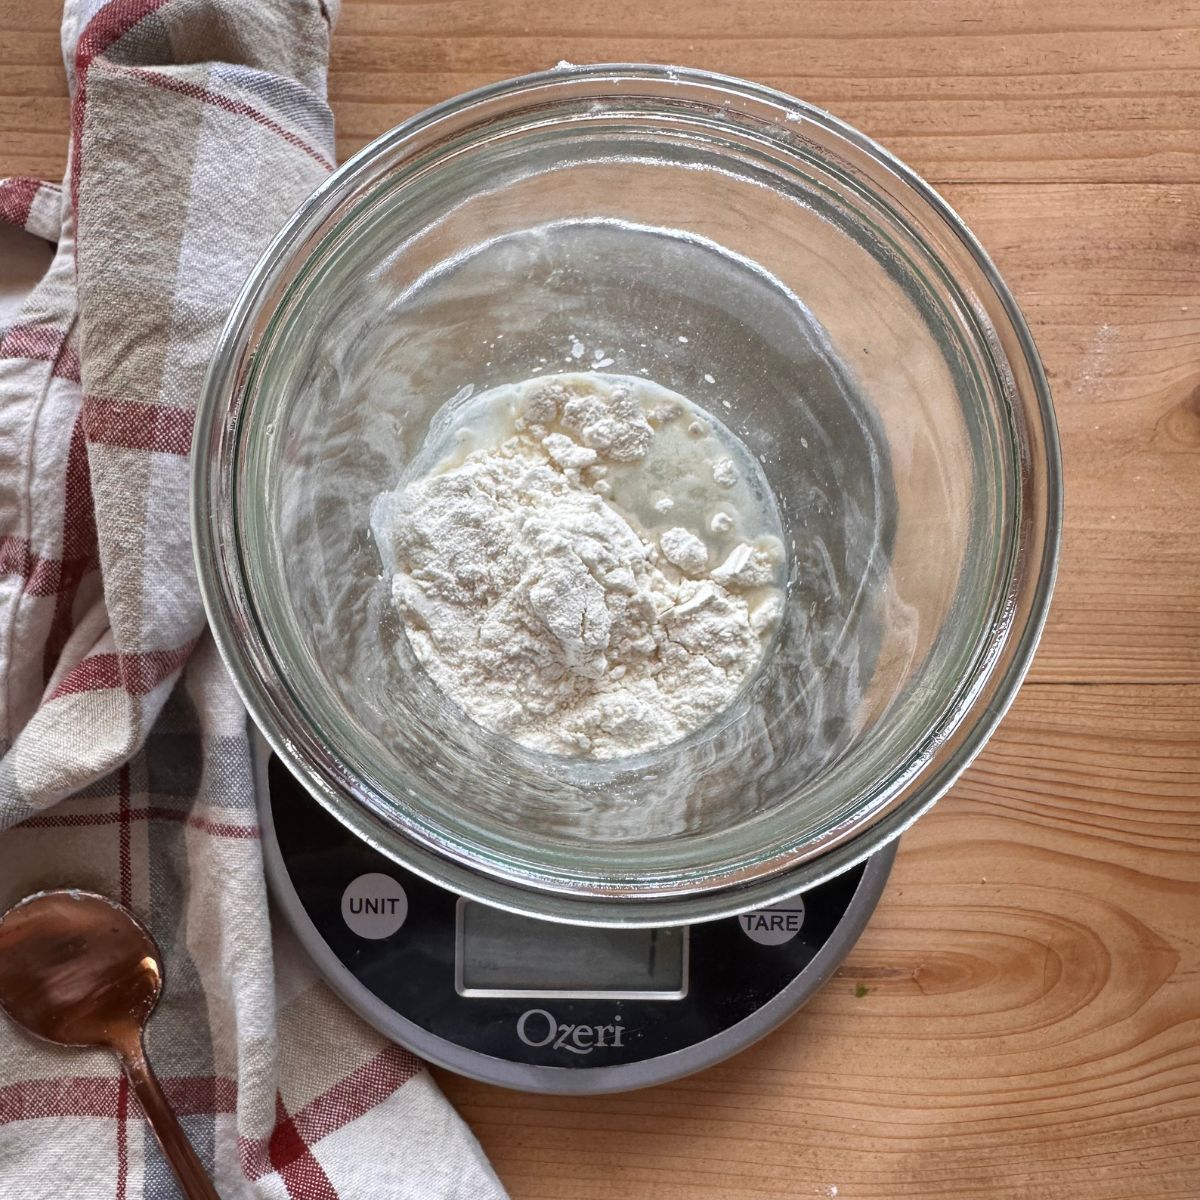
- Begin by placing the jar on a food scale, being sure to tare it out so it is set to 0 grams. Carefully measure out 30 grams each of flour and water.
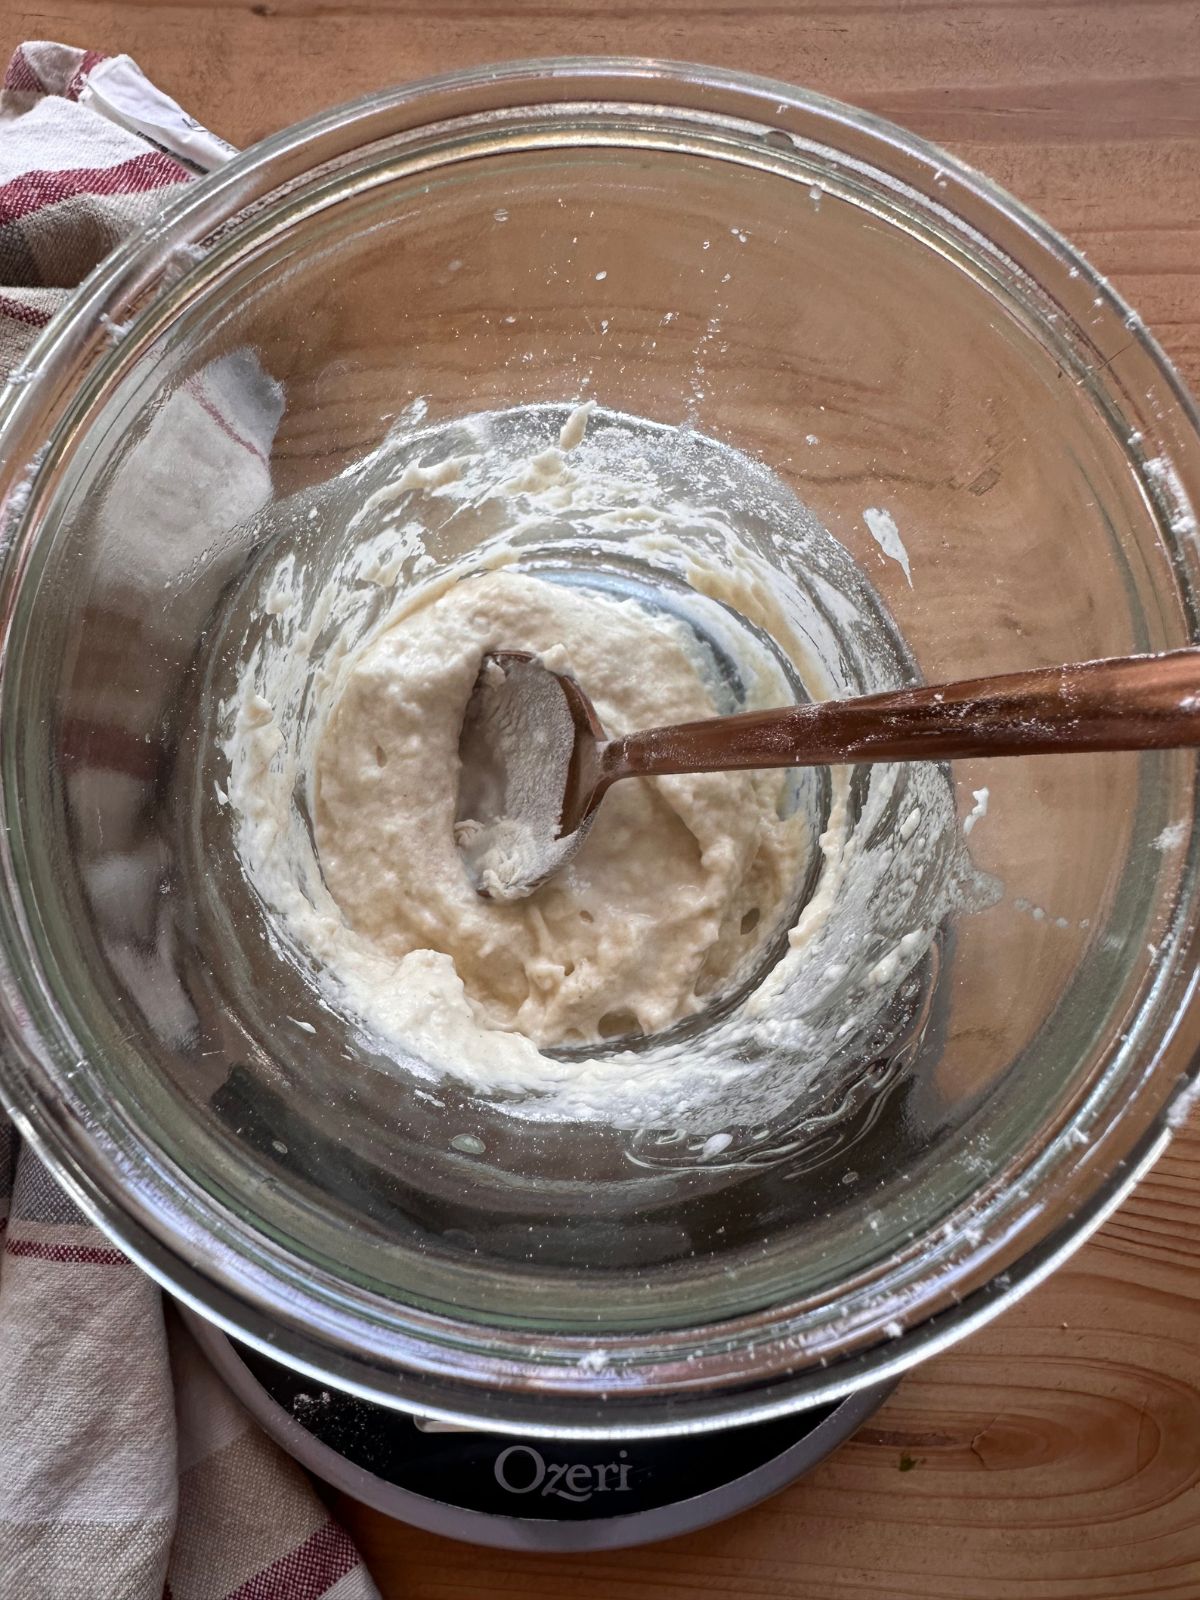
2. Mix together the flour and water until the flour is fully hydrated. The mixture will be very thick- this is ok! Cover with an airtight lid and place in a warm spot for the next 24 hours.
Day 2: All the starter needs today is a gentle stir. Allow it to continue sitting in a warm spot to continue the fermentation process.
Day 3: Discard half of the mixture by tossing into the trash, then refresh by adding 30 grams each of flour and water to the remaining starter left in the jar. Stir and cover with an airtight lid. Note: It is perfectly normal for the starter to smell bad and have liquid on the top (hooch). This just means that the fermentation process is working! You can pour off the liquid before feeding or simply stir it into the starter, whichever you prefer.
Day 4: Repeat day 3 instructions by discarding half of the starter, and then refreshing again by adding 30 grams each of flour and water. You will need to repeat this process twice today (discarding half and then feeding again), about 12 hours apart. I recommend doing it once in the morning and then again in the evening.
Days 5 & 6: Repeat day 4 instructions.
Day 7: Keep feeding twice a day as you have been for at least 14 days. At this point, you may begin to use the starter discard in recipes, rather than tossing into the trash!
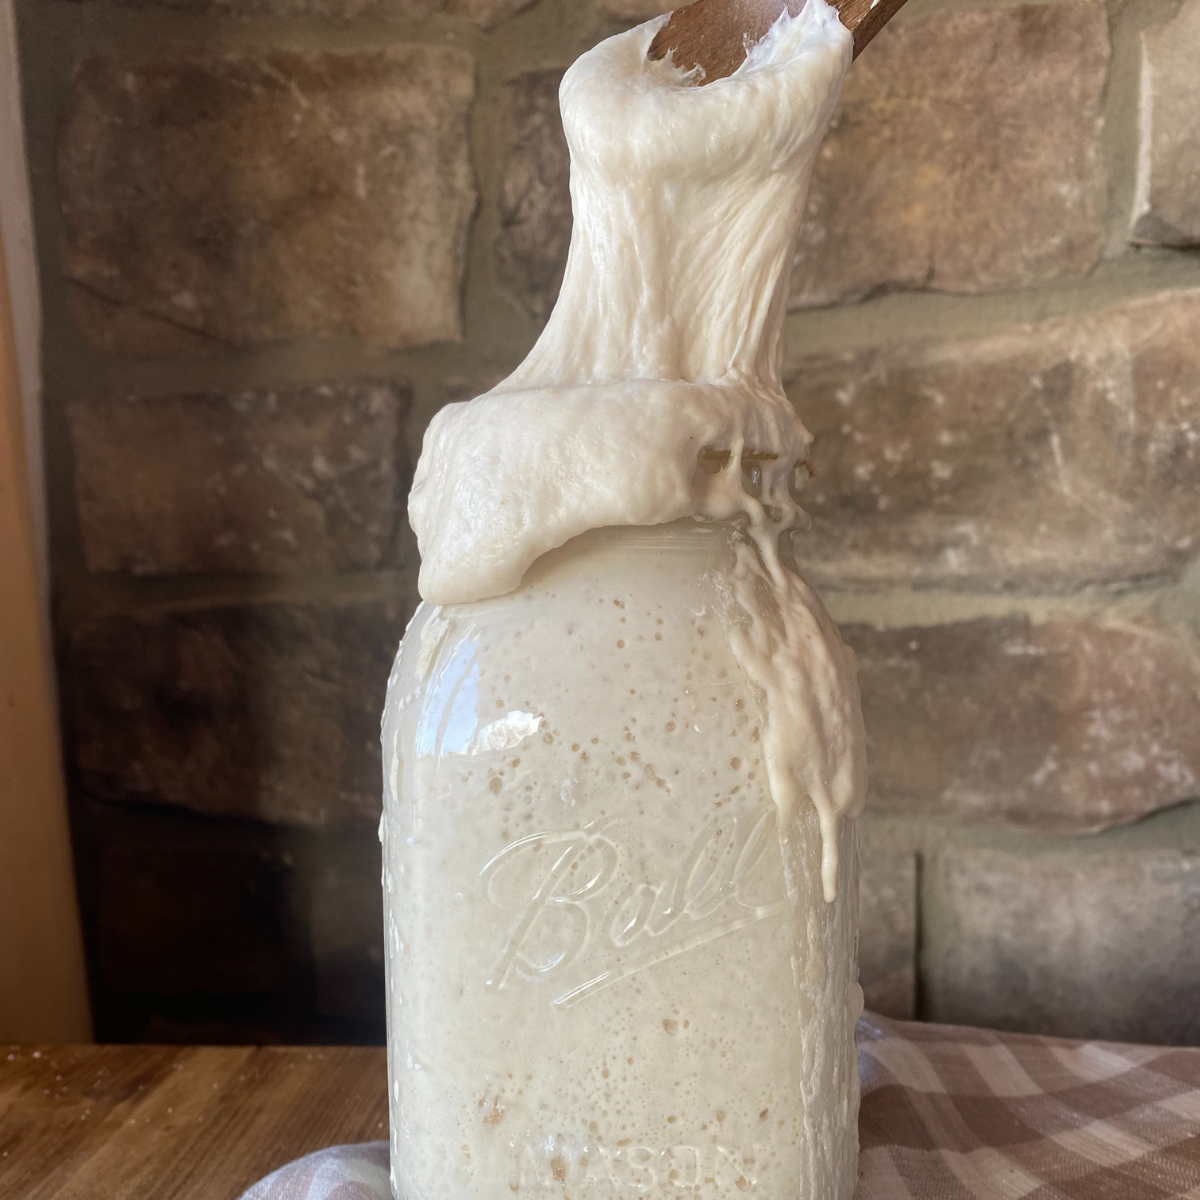
Day 14: At this point, your starter may be ready! Perform the float test to see if the starter is strong enough to bake with. To do this, feed the starter in the morning. After about 4-6 hours, the starter should have doubled in size and be at it’s most bubbly point. Fill a glass with water, then use a small spoon to scoop out a small amount of starter. Gently place it into the water. If the starter floats, it’s a good sign that it is ready to bake with. If it immediately sinks to the bottom, no worries. It just . Go through a few more feedings and then retest.
Quick Tips for a Successful Starter
- Use a Scale: Highly recommended! A food scale ensures precise, consistent measurements, which is ideal for all things sourdough and bread baking!
- Keep it in a Warm Spot: Sourdough thrives in warm temperatures. Keeping it in a fairly warm spot will accelerate the fermentation process. Do not place the starter in the fridge until it has had a chance to mature, at least 14 days.
- Discard, Discard, Discard: I cannot emphasize this enough. Although it might seem wasteful at first, discarding the starter is what keeps it healthy and thriving.
Once you are ready to bake, check out this beginner’s sourdough bread recipe!
How to Tell When It’s Ready?
- It’s Doubled in Size: After feeding, a healthy starter should rise and double in size within 4-6 hours, which is a clear sign it’s strong enough to use for baking.
- Texture is Bubbly & Light: Your starter should look airy and full of bubbles throughout, with a slightly fluffy texture that shows it’s active and fermenting well.
- Passes the Float Test: Although not foolproof, this is another way to check and see if your starter is ready to bake with. Simply drop a small amount of starter (about a teaspoon) into a glass of water. If it floats, it is generally considered ready to bake with. If it immediately sinks to the bottom, it needs more time.
Check out this beginner’s guide to feeding sourdough for the best practices to keep your starter happy and thriving!
Sourdough Starter FAQs
A layer of liquid on top of your starter is called “hooch” and simply means that it’s hungry and needs to be fed! It is an easy fix; simply pour off the hooch (or stir it back into the starter) and then follow the 1:1:1 feeding ratio.
Yes, absolutely! I primarily use King Arthur unbleached organic flour for my starter.
The initial period to create a base starter takes about 7 days. After that point, it is free to use in a variety of sourdough discard recipes. It can take longer to strengthen the starter enough to rise bread, at least 1-2 weeks. Remember good things come to those who wait!

How to Make Your Own Sourdough Starter from Scratch
- Total Time: 5 minutes
Description
Learn the steps to creating your own homemade sourdough starter! With a few simple tools and a couple of basic ingredients, it’s easy to create a thriving starter that will last for years to come.
Ingredients
- 30 grams filtered water
- 30 grams flour (I recommend bread flour or all purpose)
Instructions
- Day 1: Begin by placing the jar on a food scale, being sure to tare it out so it is set to 0 grams. Carefully measure out 30 grams each of flour and water. Mix together the flour and water until the flour is fully hydrated. The mixture will be very thick- this is ok! Cover with an airtight lid and place in a warm spot for the next 24 hours.
- Day 2: All the starter needs today is a gentle stir. Allow it to continue sitting in a warm spot to continue the fermentation process.
- Day 3: Discard half of the mixture by tossing into the trash, then refresh by adding 30 grams each of flour and water to the remaining starter left in the jar. Stir and cover with an airtight lid. Note: It is perfectly normal for the starter to smell bad and have liquid on the top (hooch). This just means that the fermentation process is working! You can pour off the liquid before feeding or simply stir it into the starter, whichever you prefer.
- Day 4: Repeat day 3 instructions by discarding half of the starter, and then refreshing again by adding 30 grams each of flour and water. You will need to repeat this process twice today (discarding half and then feeding again), about 12 hours apart. I recommend doing it once in the morning and then again in the evening.
- Days 5-6: Repeat day 4 instructions.
- Day 7: Keep feeding twice a day as you have been for at least 14 days. At this point, you may begin to use the starter discard in recipes, rather than tossing into the trash!
- Day 14: At this point, your starter may be ready! Perform the float test to see if the starter is strong enough to bake with. To do this, feed the starter in the morning. After about 4-6 hours, the starter should have doubled in size and be at it’s most bubbly point. Fill a glass with water, then use a small spoon to scoop out a small amount of starter. Gently place it into the water. If the starter floats, it’s a good sign that it is ready to bake with. If it immediately sinks to the bottom, no worries. It just needs more time. Go through a few more feedings and then retest.
Notes
- Storage: Keep the starter in a warm spot on the counter for the first 14 days. The starter needs time to mature before keeping in the fridge to store.
- Discarding: Discarding half of the starter each day is essential to keeping a happy and healthy starter! After the first 7 days, you may begin to use your starter in a variety of sourdough discard recipes, rather than tossing into the trash.
- Prep Time: 5 minutes
- Category: Sourdough
Happy baking!
You got this,