How to Make Homemade Greek Yogurt (Instant Pot Method)
Learn how to make homemade Greek yogurt to feed your family at half the cost! This Greek yogurt recipe is made in the Instant Pot and then strained overnight to create a thick, creamy yogurt that is rich in probiotics and packed with protein. Use it in a variety of recipes for a gut healthy boost!

Instant Pot Greek Yogurt: Thick + Creamy Every Time.
I am fully convinced that if you own an Instant Pot, you have cracked the code to life.
My Instant Pot is one of my #1 used tools in the kitchen, and I hate to say that it took me years to finally buy one.
Was it worth the investment? 10,000%! It is extremely versatile for making dinner in a jif (Mexican shredded beef anyone?), makes meal prep easy (looking at you shredded chicken and easy hard boiled eggs), and even makes yummy staples like homemade cinnamon applesauce! And now- yogurt!
This guide to making Greek yogurt goes a little more in depth than my post on making raw milk yogurt in the Instant Pot, providing details on getting the thickest, creamiest texture. It’s really very simple- all you need is time!

Quick Recipe Snapshot
TOTAL TIME: 10 minutes prep time, plus 12 hours to let the Instant Pot do its thing. It’s mostly all hands off, which is a plus in my book.
YIELD: About 16 servings.
STORAGE: Stores well in an airtight container in the fridge for up to 2 weeks.
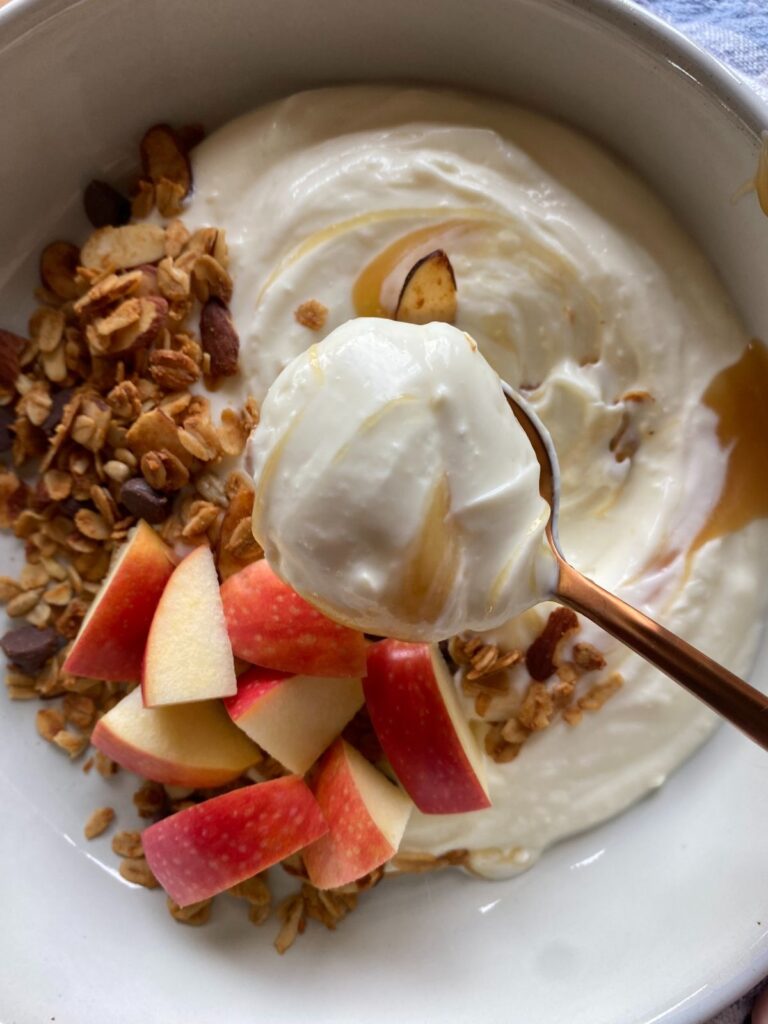
BEST SERVED WITH: I love with with this easy homemade granola, a drizzle of honey, and fresh fruit.
What You’ll Love About This Yogurt
Ingredients You’ll Need

Tips for Preparing to Make This Recipe
- Starter Culture: You can make homemade yogurt using a yogurt starter culture like the one listed above, or by using 1 cup of already made homemade yogurt. Store-bought yogurt will also work! I recommend trying to find a high-quality organic option that contains active live cultures. Also, make sure it is plain and not flavored or sweetened.
- Adding Flavors/Sweeteners: If you like to sweeten your yogurt, I recommend adding in any sweeteners and/or flavors after the yogurt has set and then been strained.
Be sure to check out the full recipe and ingredient list below!
Method at a Glance
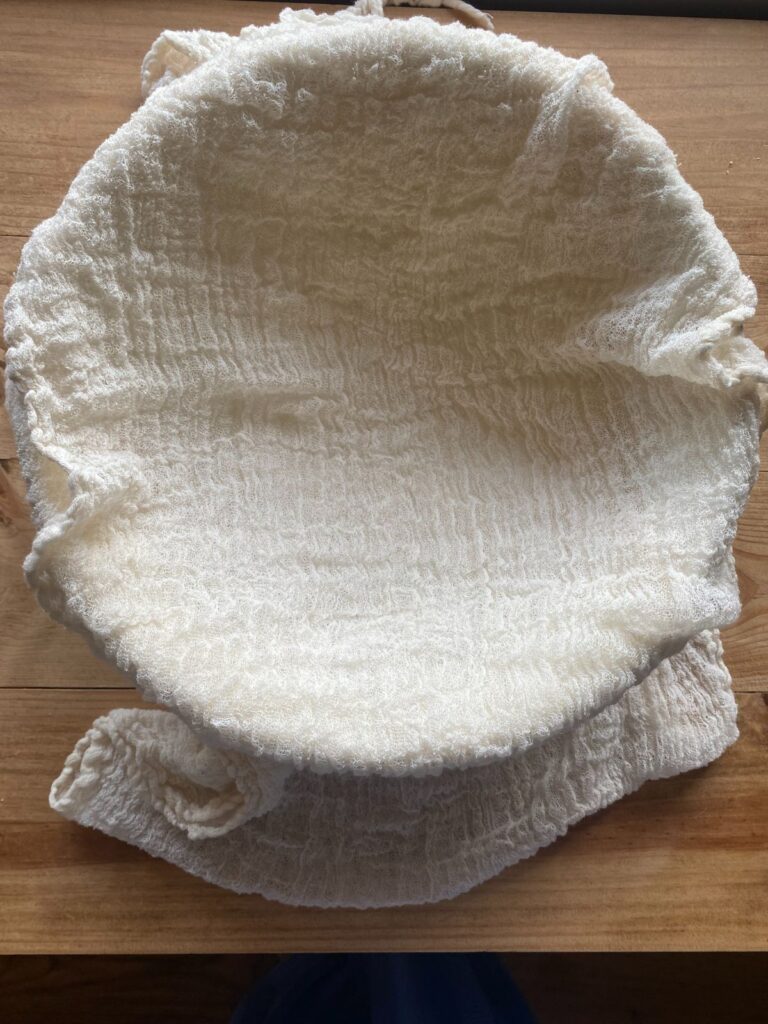
Cover a large bowl with cheesecloth or a thin tea towel.
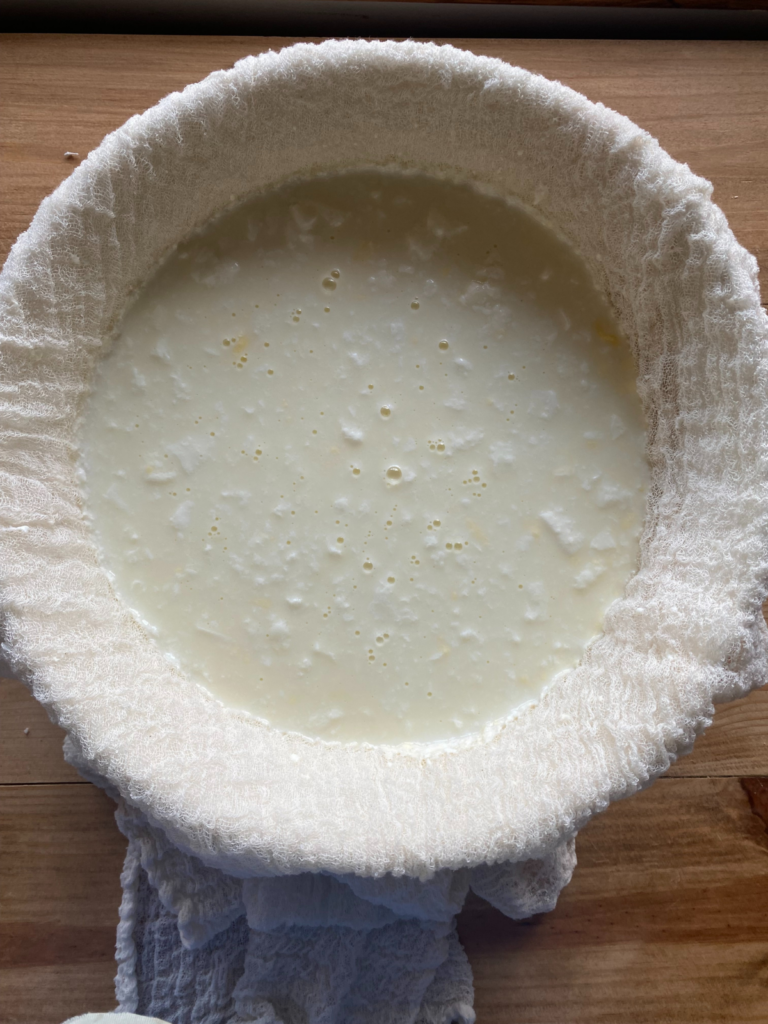
Add the yogurt mixture.
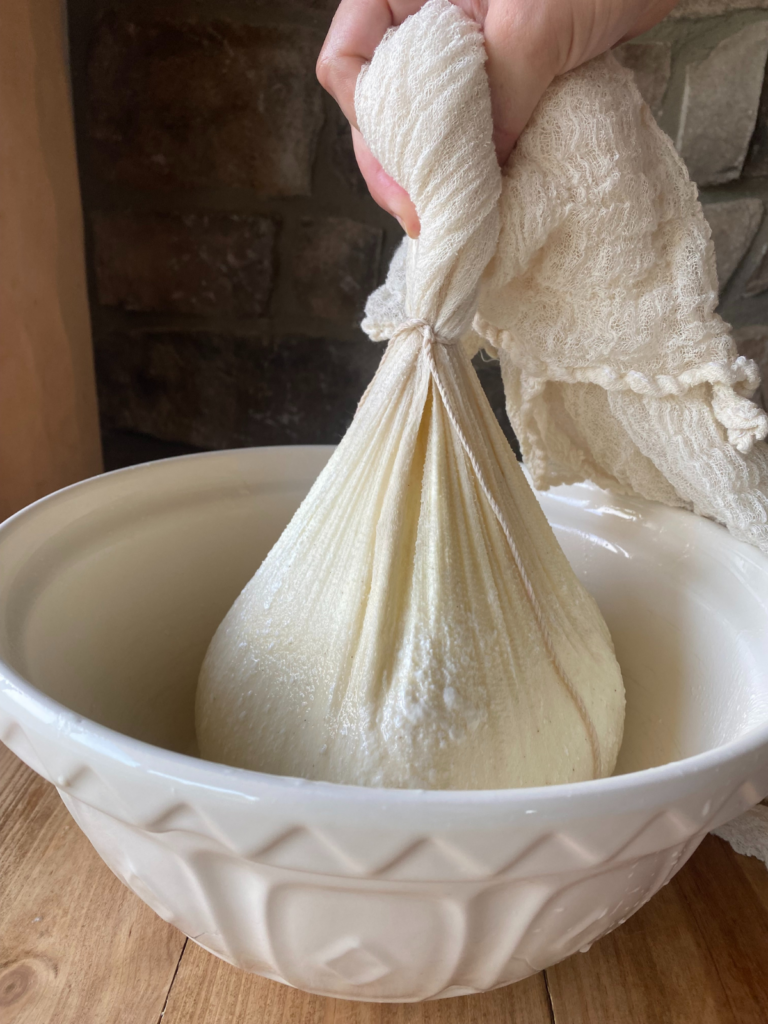
Tie the cheesecloth with twine.
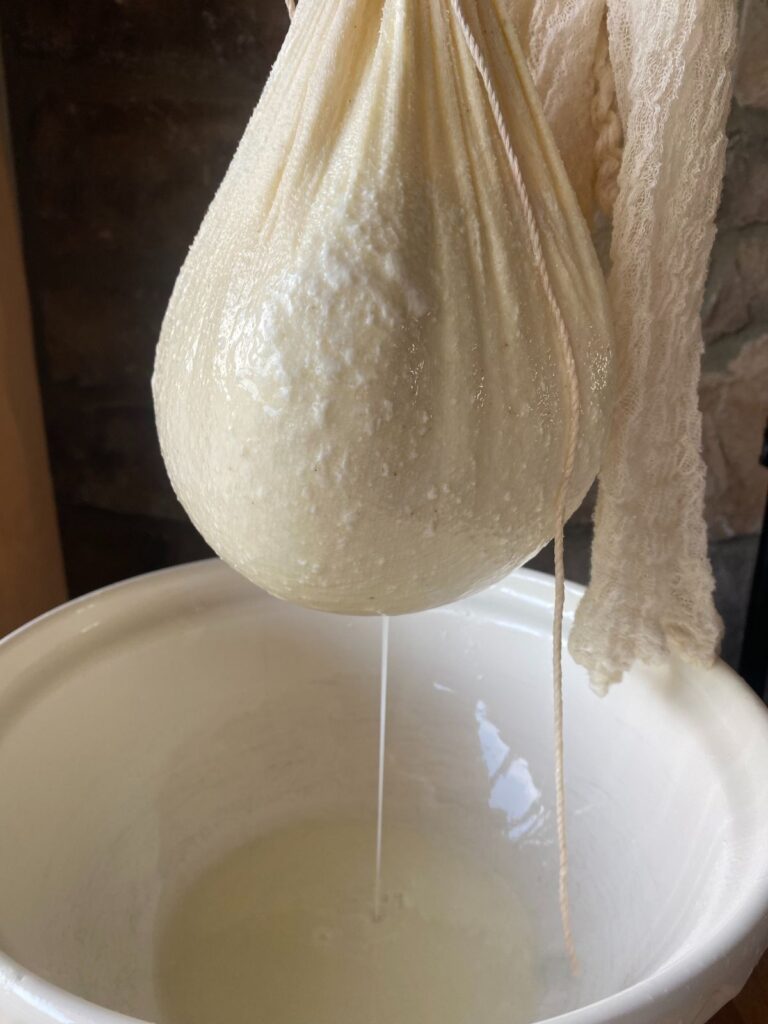
Begin straining the whey from the yogurt. It is at this point that I will place the yogurt over a large fine mesh strainer and then place in the fridge for 10-12 hours to strain and thicken.
Step by Step Instructions
- Begin by adding the raw milk to the Instant Pot. Click the SAUTE button and allow the milk to heat to around 180 degrees. Use a food thermometer to accurately measure the temperature.
- Once the milk has heated, turn the SAUTE button off and allow the milk to cool back down to 110-115 degrees.
- Once cooled, sprinkle in one packet of yogurt starter culture, whisking it into the milk.
- Place the lid on the Instant Pot. Press the YOGURT button and set the time for a minimum of 8 hours and up to 24 hours. Keep in mind that the longer the yogurt sits, the thicker and more sour it will become. I usually like to set mine for 8-12 hours.
- Once the time is up, remove the lid and give the yogurt a stir. Transfer 1 cup to a small jar to save for the next batch. Add the remaining yogurt to a large bowl.
- Place a fine mesh strainer over the large bowl (to catch the whey), then line the strainer with cheesecloth or a clean tea towel. Pour the yogurt into the lined strainer, and then gently gather up the ends of the cheesecloth or towel and tie them together with twine. Strain for 10-12 hours. The longer you let the yogurt strain, the thicker the Greek yogurt will become.
- Add the thickened yogurt to large containers (I use large Mason jars) to store in the fridge for up to 2 weeks.
Recipe FAQs
The biggest difference is that Greek yogurt is strained to remove whey, making it thicker, creamier, and higher in protein than regular yogurt.
Yes! You can reuse your homemade yogurt as a starter up to 3–4 times, but over time the cultures can weaken. I recommend saving 1 cup of yogurt from each batch to save for the next.
Whey is rich in protein and probiotics. It can be added to other recipes, like smoothies! It can also be used as a liquid to soak grains.
Yes! After it’s fully strained and chilled, you can stir in honey, fruit, vanilla extract, or other spices to customize it to your taste.
Pin it For Later!

More Staple Recipes
Check out these other reader favorite recipes!


Instant Pot Greek Yogurt
- Total Time: 12 hours 10 minutes
- Yield: 16 servings 1x
Description
Learn how to make homemade Greek yogurt to feed your family at half the cost! This Greek yogurt recipe is made in the Instant Pot and then strained overnight to create a thick, creamy yogurt that is rich in probiotics and packed with protein. Use it in a variety of recipes for a gut healthy boost!
Ingredients
1 gallon raw milk
1 packet yogurt starter culture (I like Cultures for Health)
Instructions
- Make the Yogurt: Begin by adding the milk to the Instant Pot. Click the SAUTE button and allow the milk to heat to around 180 degrees. Use a food thermometer to accurately measure the temperature.
- Once the milk has heated, turn the SAUTE button off and allow the milk to cool back down to 110-115 degrees.
- Once cooled, sprinkle in one packet of yogurt starter culture, whisking it into the milk.
- Place the lid on the Instant Pot. Press the YOGURT button and set the time for a minimum of 8 hours and up to 24 hours. Keep in mind that the longer the yogurt sits, the thicker and more sour it will become. I usually like to set mine for 8-12 hours.
- Once the time is up, remove the lid and give the yogurt a stir. Transfer 1 cup to a small jar to save for the next batch. Add the remaining yogurt to a large bowl.
- Place a fine mesh strainer over the large bowl (to catch the whey), then line the strainer with cheesecloth or a clean tea towel. Pour the yogurt into the lined strainer, and then gently gather up the ends of the cheesecloth or towel and tie them together with twine. Strain for 10-12 hours. The longer you let the yogurt strain, the thicker the Greek yogurt will become.
- Add the thickened yogurt to large containers (I use large Mason jars) to store in the fridge for up to 2 weeks.
Notes
- Starter Culture: You can make homemade yogurt using a yogurt starter culture like the one listed above, or by using 1 cup of already made homemade yogurt. Store-bought yogurt will also work! I recommend trying to find a high-quality organic option that contains active live cultures. Also, make sure it is plain and not flavored or sweetened.
- Adding Flavors/Sweeteners: If you like to sweeten your yogurt, I recommend adding in any sweeteners and/or flavors after the yogurt has set and then been strained.
- Prep Time: 10 minutes
- Cook Time: 12 hours
- Category: Breakfast Recipes
- Cuisine: American
If you enjoyed this recipe for homemade Greek yogurt, be sure to come back and leave a comment and a 5 star review! Tag me on Instagram with any creations @ourhandcraftedhomeblog.


Love this! It really is so simple and I love that it saves money.
How can I make it flavored yogurt like vanilla? Can you add pureed fruit, do you know how to go about that so it doesnt go bad? Thank youfor any help.
Hi Bree!
I always add any flavors into individual servings after the yogurt has been made. When you are ready to serve, you can add in a spoonful of pureed fruit, honey, vanilla, etc. to flavor it. If you add flavors to the entire batch, it could affect the culture of the yogurt.
Hope this helps! Enjoy!