Chocolate Sandwich Cookies with Strawberry Filling (Easy Valentine’s Dessert!)
Easy to make and downright adorable, these heart shaped strawberry chocolate sandwich cookies are perfectly paired with a luscious layer of creamy strawberry frosting sandwiched right in the middle, making them the perfect Valentine’s Day dessert recipe!

Okay, is it technically February 16th when I’m posting this so called “Valentine’s Day” recipe?
Ah, yes. (…sorry about that).
But hey! The good news is that Valentine’s Day will be here again before we know it, and you will definitely be prepared to woo your Valentine with this easy and delicious chocolate cookie recipe! Forget boring boxes of chocolates or store-bought cookies- we won’t need ’em 😉
If you ask me, nothing says “I love you” quite like a mouthful of rich, decadent chocolate paired with luscious strawberry goodness.
So easy and delicious, this cookie recipe is a guaranteed winner for you and your Valentine.
Let’s make ’em!
Why You’ll Love This Recipe
Ingredients You’ll Need
This is a quick overview of some essential ingredients needed for this recipe. Be sure to check out the recipe card below for the full list!
Tips for Preparing to Make This Recipe
- Be sure to chill the cookie dough. Skipping this step could result in cookies that spread too thin, making it harder for them to hold up to the frosting.
- I always like to slightly underbake my cookies in order to obtain a chewier texture. They will continue to cook briefly on the cookie sheet once they are pulled out of the oven.
- This chocolate sandwich cookie recipe uses Dutch process cocoa powder, which I prefer because of the depth of flavor. However, you can easily substitute unsweetened cocoa powder.
- This recipe will yield different amounts of cookies depending on the sizes of cookie cutters you use.
Be sure to check out the full recipe and ingredient list below!
Shop Recommended Tools
Disclaimer: As an Amazon associate, I earn from qualifying purchases with no extra cost to you. Read my full disclosure policy.
How to Make Chocolate Sandwich Cookies
- Make the cookie dough: In the bowl of a stand mixer fitted with a paddle attachment or a large mixing bowl, cream together the butter and sugars on medium high speed until light, about 1 minute.
- Turning the mixer down to medium speed, beat in the eggs and vanilla extract.
- Begin slowly adding in the dry ingredients, continuing to mix until thoroughly combined.
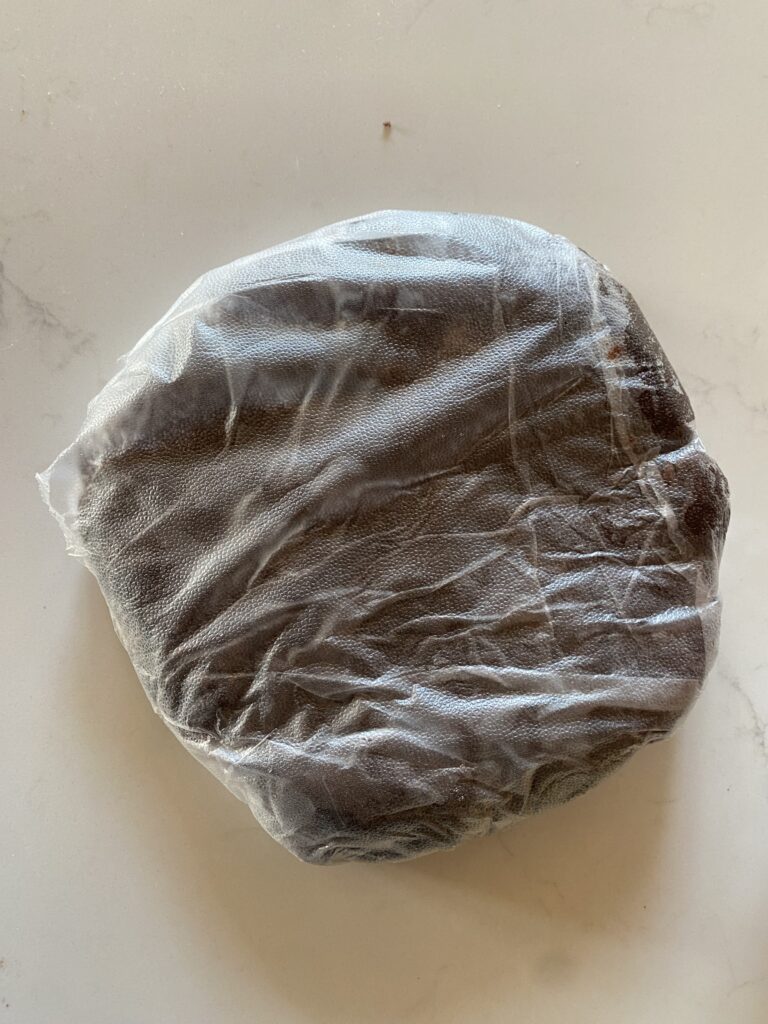
- Once the cookie dough is completely mixed, turn it out onto a large sheet of plastic wrap and wrap tightly. Press the cookie dough into a flattened disc shape so its easier to roll out later, and then chill the dough for 1-2 hours before rolling out.
- Make the frosting: In a small mixing bowl, combine softened cream cheese and butter. Using a handheld electric mixer, beat the butter and cream cheese together until thoroughly combined and light, about 1-2 minutes.
- Add in ⅓ cup mashed strawberries, mixing until incorporated. Slowly add in the powdered sugar, 1 cup at a time, until combined. The frosting should be fairly thick. If you find it’s too thin, add more powdered sugar. If the frosting becomes too thick, add in 1-2 tablespoon of milk at a time until it reaches the desired consistency.
- Store frosting in the fridge until ready to use.
- Bake the cookies: Preheat oven to 350 degrees F. On a lightly floured surface, use a rolling pin to roll out the cookie dough to ¼” inch thickness between two pieces of parchment paper.
- Use your favorite cookie cutters to cut out shapes, and place the cookies 2 inches apart on a baking sheet lined with parchment paper or a silpat baking mat.
- Bake in preheated oven for approximately 8-10 minutes.
- For best results, let them sit on the cookie sheet for a few minutes before removing to a wire rack to cool. Make sure the cookies are cooled completely before frosting and assembling.
- Assemble the cookies: Once the cookies have cooled completely, use a plastic sandwich bag with a corner cut off or a piping bag to slowly pipe a small amount of icing onto the back of each cookie. Lightly press another cookie on top. Repeat until all the cookie sandwiches have been assembled. Enjoy!


Can I Freeze Cookie Dough?
Yes! These cookies can be made ahead of time and placed in the freezer until ready to bake. Sometimes I will make double the amount of cookie dough just so I can freeze some to have at a later time. My method for this is to scoop out balls of cookie dough and add them to a gallon sized freezer safe bag, making sure I store the bag laying flat in the freezer. For this recipe, I recommend shaping the cookie dough into a large disc shape and then adding to a large freezer safe bag. This will make them easier to roll out later!
Once you are ready to bake, you can pop the cookies straight from the freezer into the oven, or set out on the counter to thaw beforehand. If you are putting them straight in the oven from the freezer, you may need to adjust your baking time to allow the frozen dough extra time to bake.

Recipe FAQs
Yes! This cookie dough can be made up to 1-2 days in advance and stored in the fridge until ready to use.
Typically, I recommend storing cookies in an airtight container on the counter for up to 3 days. However, due to the strawberry cream cheese filling, these cookies will store best in the fridge.
More Dessert Recipes
Check out these reader favorites, straight from my log cabin kitchen!


Pin it For Later!


Chocolate Sandwich Cookies with Strawberry Filling
- Total Time: 2 hours 8 minutes
Description
Easy to make and downright adorable, these heart shaped strawberry chocolate sandwich cookies are perfectly paired with a luscious layer of creamy strawberry frosting sandwiched right in the middle, making them the perfect Valentine's Day dessert recipe!
Ingredients
Chocolate Sandwich Cookies
- 2 sticks softened butter
- 1 cup brown sugar
- ½ cup white sugar
- 2 eggs
- ½ cup Dutch process cocoa powder
- 1 tsp espresso powder
- 1 tsp baking powder
- 1 tsp baking soda
- 1 tsp salt
Strawberry Frosting
- 4 oz cream cheese (softened)
- 4 TB ½ stick butter, softened
- ⅓ cup mashed strawberries
- 3 cups powdered sugar
Instructions
- Make the cookie dough: In the bowl of a stand mixer fitted with a paddle attachment or a large mixing bowl, cream together the butter and sugars on medium high speech until light, about 1 minute.
- Turning the mixer down to medium speed, beat in the eggs and vanilla extract.
- Begin slowly adding in the dry ingredients, continuing to mix until thoroughly combined.
- Once the cookie dough is completely mixed, turn it out onto a large sheet of plastic wrap and wrap tightly. Press the cookie dough into a flattened disc shape so its easier to roll out later, and then chill the dough for 1-2 hours before rolling out.
- Make the frosting: In a small mixing bowl, combine softened cream cheese and butter. Using a handheld electric mixer, beat the butter and cream cheese together until thoroughly combined and light, about 1-2 minutes.
- Add in ⅓ cup mashed strawberries, mixing until incorporated. Slowly add in the powdered sugar, 1 cup at a time, until combined. The frosting should be fairly thick. If you find it's too thin, add more powdered sugar. If the frosting becomes too thick, add in 1-2 tablespoon of milk at a time until it reaches the desired consistency.
- Store frosting in the fridge until ready to use.
- Bake the cookies: Preheat oven to 350 degrees F. On a lightly floured surface, use a rolling pin to roll out the cookie dough to ¼” inch thickness between two pieces of parchment paper.
- Use your favorite cookie cutters to cut out shapes, and place the cookies 2 inches apart on a baking sheet lined with parchment paper or a silpat baking mat.
- Bake in preheated oven for approximately 8-10 minutes.
- For best results, let them sit on the cookie sheet for a few minutes before removing to a wire rack to cool. Make sure the cookies are cooled completely before frosting and assembling.
- Assemble the cookies: Once the cookies have cooled completely, use a plastic sandwich bag with a corner cut off or a piping bag to slowly pipe a small amount of icing onto the back of each cookie. Lightly press another cookie on top. Repeat until all the cookie sandwiches have been assembled. Enjoy!
Notes
- Prep Time: 2 hours
- Cook Time: 8 minutes
If you loved this recipe for easy chocolate sandwich cookies, make sure to come back and leave it a 5 star rating and a comment! I would love to know how it turned out for you. Tag @ourhandcraftedhomeblog on Instagram with your creations!